Mônica Moura
Animation
Films
A Festa
Lapso
(OvO)
Babel
Motion Devices
Ciclo
TV de Cachorro
Reverso
Janelas
Morango, Jabuticaba, Amora
Strata Cut
Gifs & Bits
✎ Tutorials
☞ Commercial Work
About
Vimeo
Tumblr
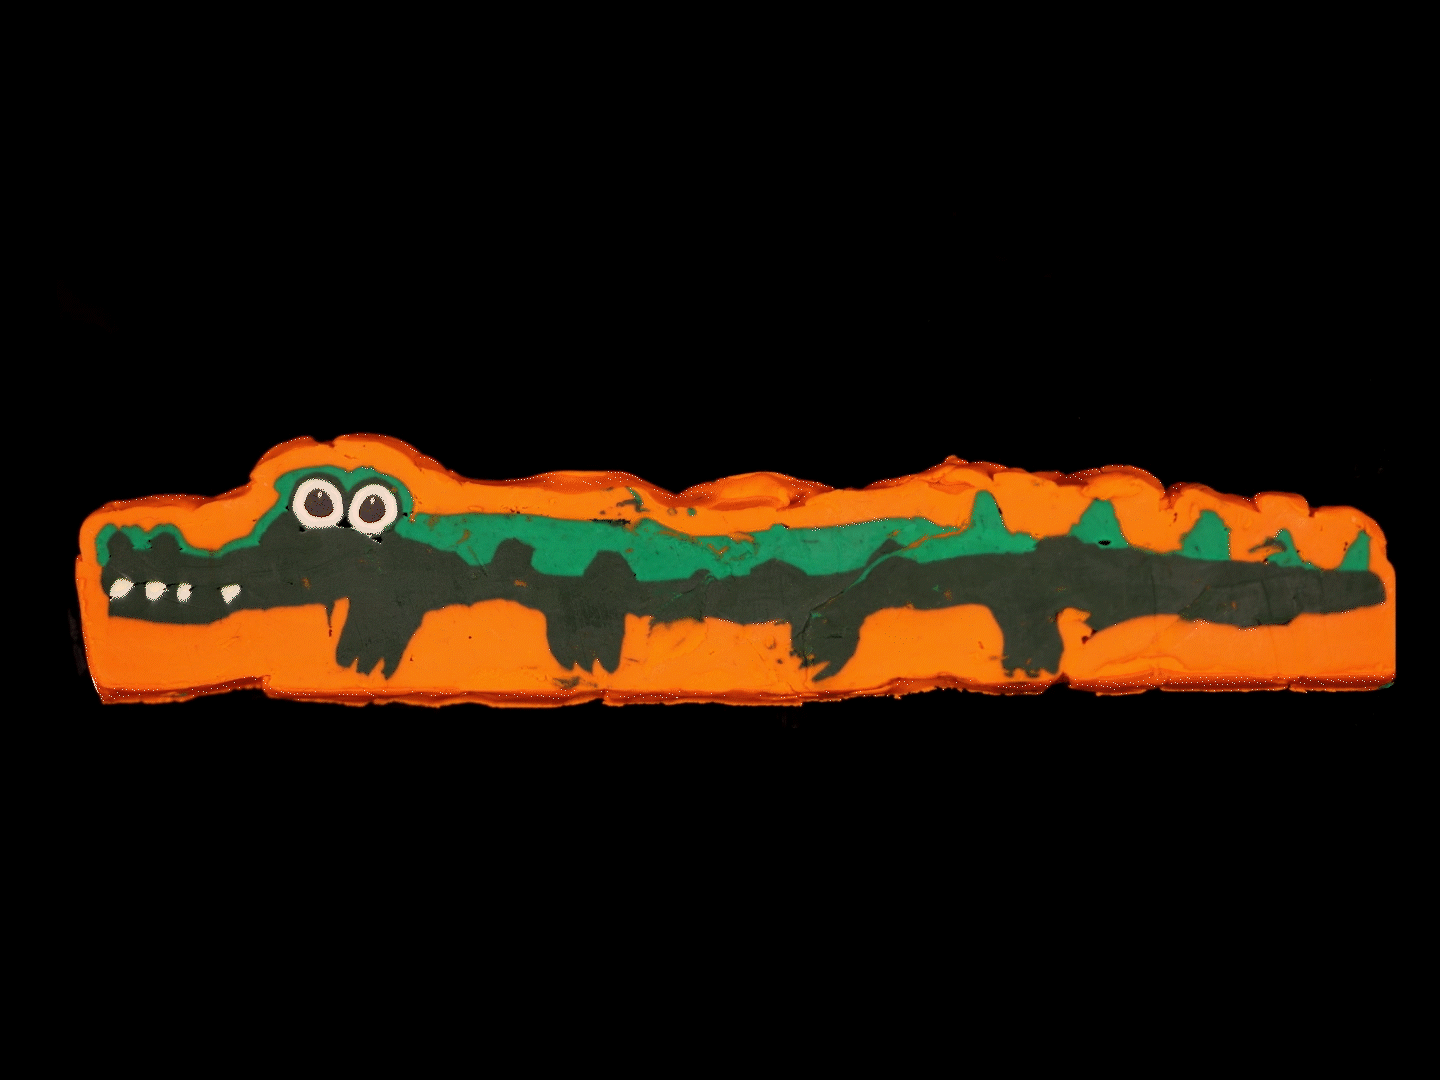
Strata Cut
Part 3: Alligator “walk cycle”
- Legs
The legs didn’t really go as planned. We can see in the animation that the alligator doesn’t seem to be exactly walking, but more like swimming or floating. I’ll try to explain why that happened by the end of this segment.
First, we need to determine the key positions of each leg. Since the alligator’s legs are very short, I didn’t bend them at any point.

Then, we can identify the shape of each leg from a top view.
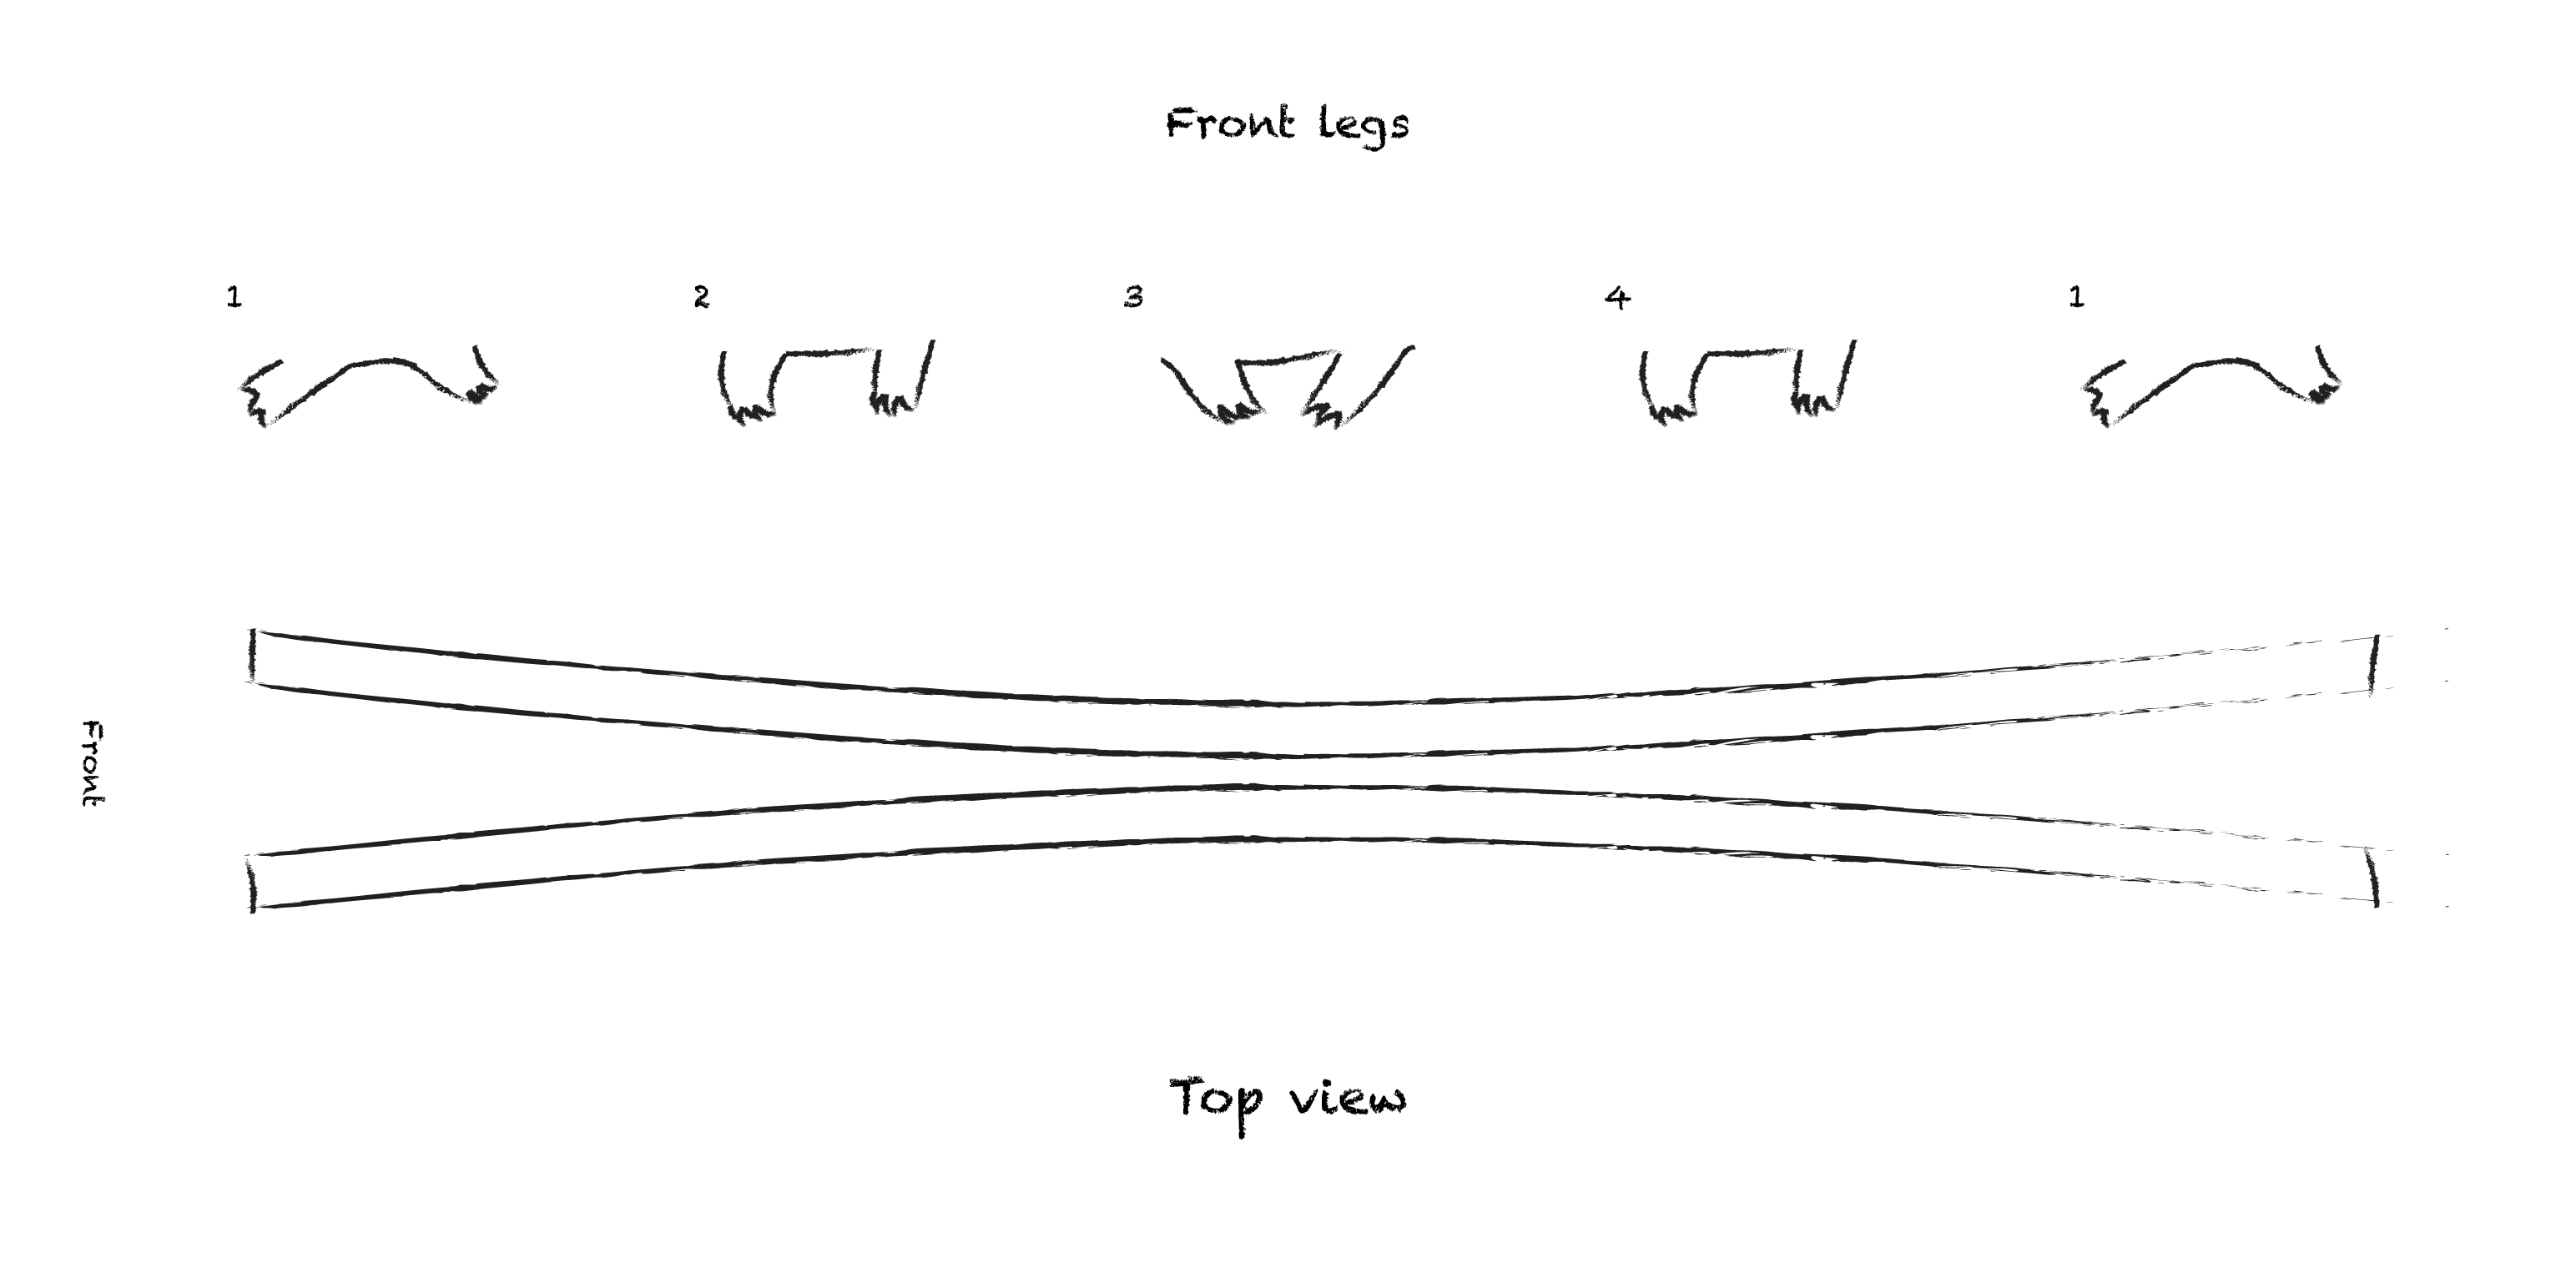
Just the change in position from each leg is not enough, since there’s also a tilt forward and back at the end of the movement. So, the rectangular shapes that make the legs need to be inclined.

To achieve that, we need to twist the legs slightly.

After we do that on each leg, we can make the cuts to shape the fingers.

There are two main reasons for this walk cycle ending up looking the way it does:
1- I made the length of the legs to long, which made the movement very slow when cut.
2- I didn’t lift the legs in any point, which would be ok if there was some up and down motion in the body (so it could be more of a hoping style of walking).
- Tail
For the tail, the most important part is the “negative space” (in orange). That is because, in strata cut, we cannot lift something without having a physical support for it. So first I planned out the 3 positions of the tail (down, up, and down again).

Then, I planned the shape of the supporting parts.

Once these parts are visualized, I distributed them in time.

- Mouth
For the mouth, the bottom part stays in place throughout the entire animation while the top part rises and reveals the bottom teeth. To make things easier, we should consider the top set of teeth as part of the upper part of the mouth.

The bottom teeth and the orange background appear and disappear, however behaving a bit differently. The teeth first appear small, as they are still partially covered by the top ones, and then appear fully, keeping that size until they disappear again. The orange part, just like in the tail, is the negative space. So, it keeps growing as the mouth opens, even after the bottom teeth are fully visible.

The bottom teeth then will look like a plateau with slight inclinations on both ends and the orange part will be filling the spaces as the mouth opens.

We must then make the top teeth and the upper lip follow this hill-like shape just like we did with the tail.
- Eyes
The eyes are made of only 3 parts: the pupil, the glow on the pupil and the sclera (white part). Each of these parts is a cylinder inside each other.
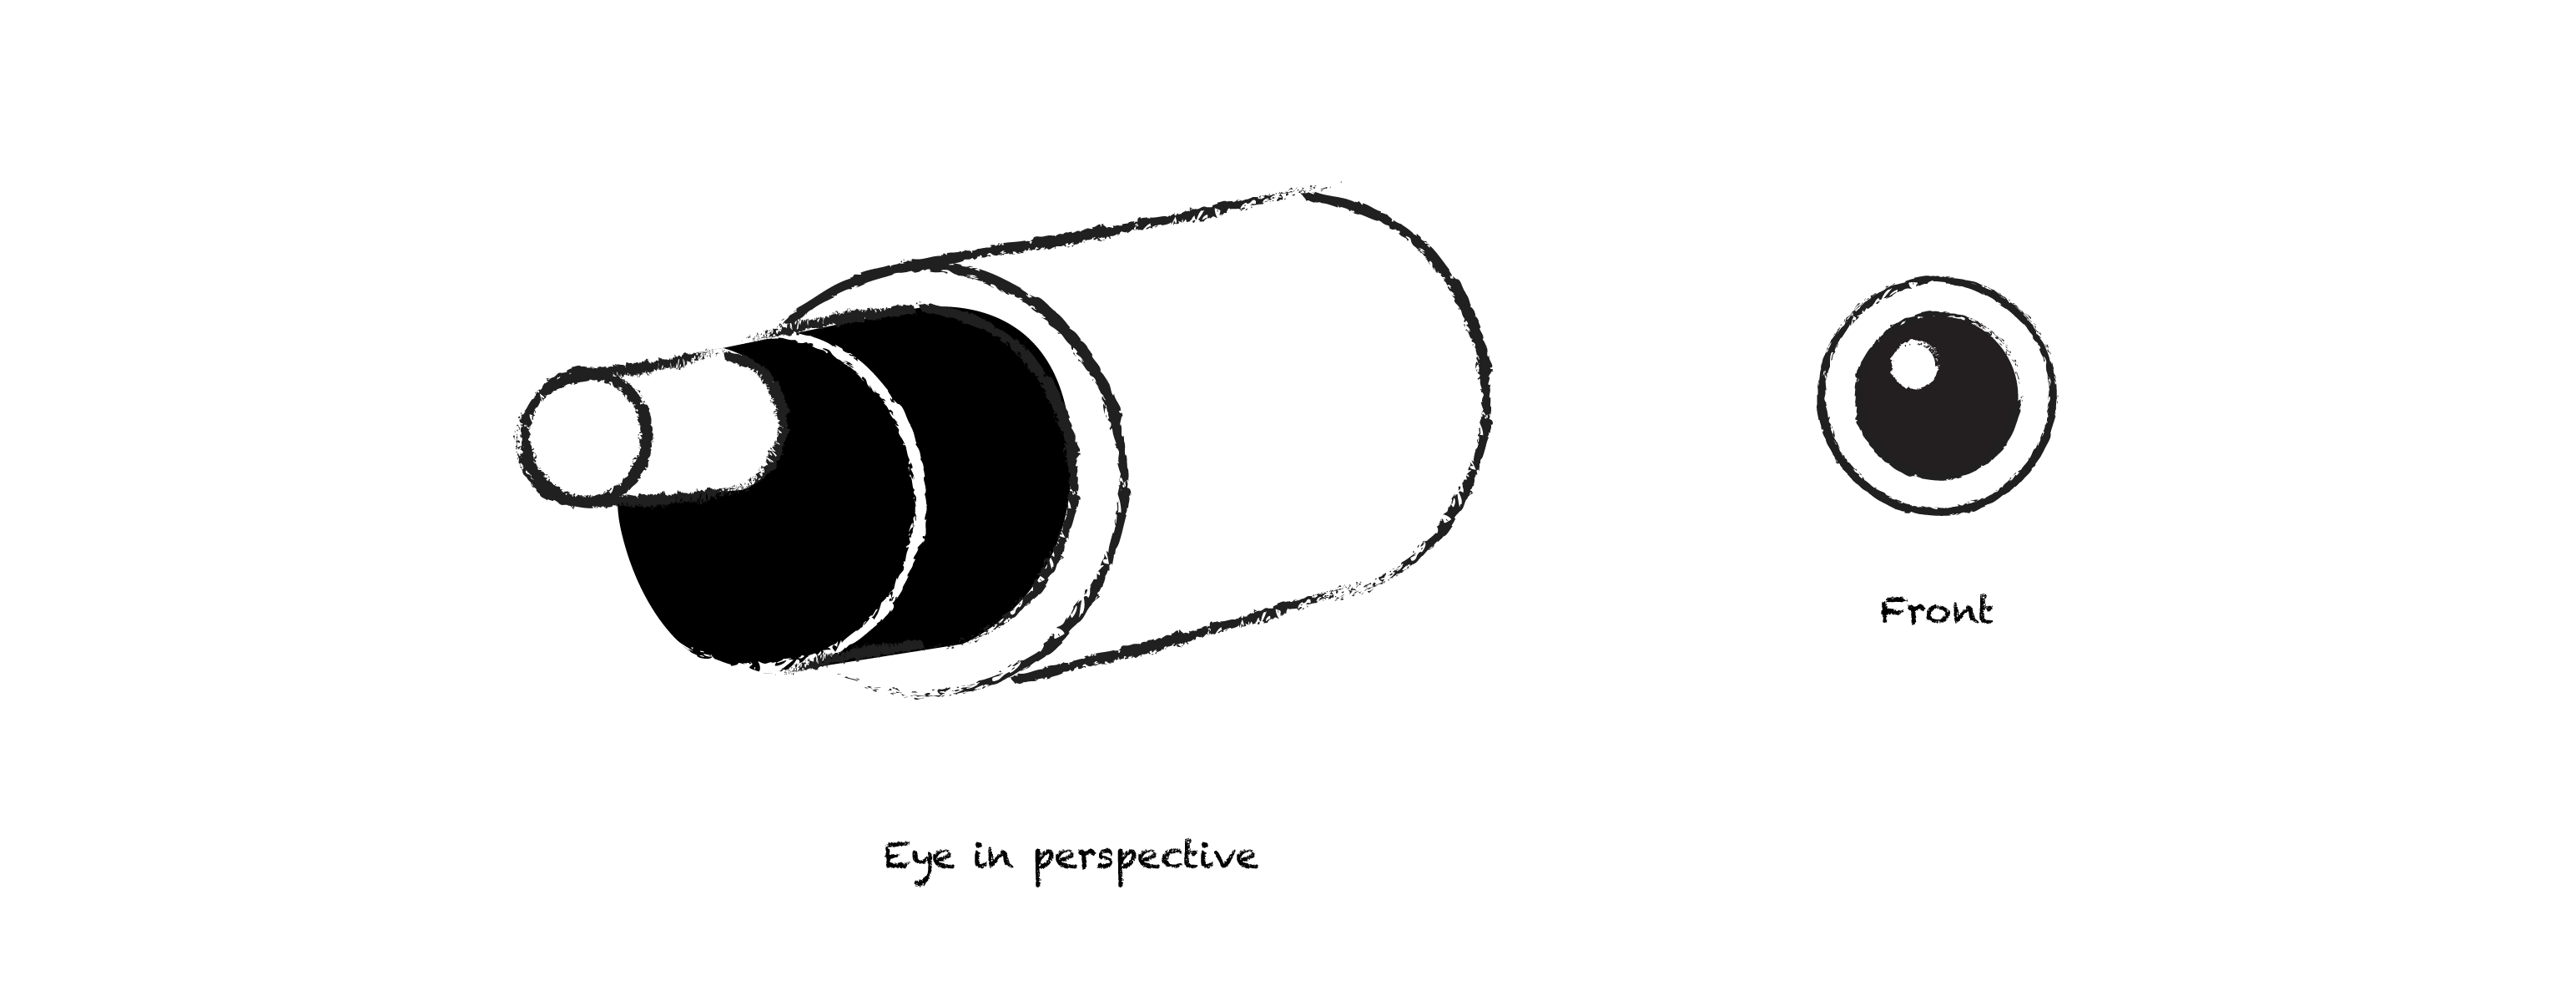
In order to assemble, we start with the white cylinder for the twinkle. That is then wrapped by a very thin black rectangle, keeping the white part off center. Finally, we wrap everything in white again. In order to make the eyes turn like they do in the animation, simply roll the entire cylinder homogeneously until the desired size.
- Tips on putting everything together
- Gravity is a thing, so start from the bottom and remember there should be a support for every part you’re building.
- For the tiny bits, remember the negative space and try to fit everything like a puzzle, otherwise you may end up deforming your piece as you combine the parts.
- When there are so many elements, the figure ends up way bigger than you initially planned, so I recommend making a drawing first and trying to use its size as a guide.
Sponsored by the Student Union
© Mônica Moura 2025